How to Put a Sidebar on a WordPress Twenty Eleven Page Like This One – UPDATED

I just changed the theme on this self-hosted WordPress blog. So – no big deal, it’s as easy as pressing a button, right? Not exactly. Not if you want to modify the theme. Not if you are in the BlogHer Ad Network and need an ad in a sidebar on both the main blog page, single blog post pages and site pages.
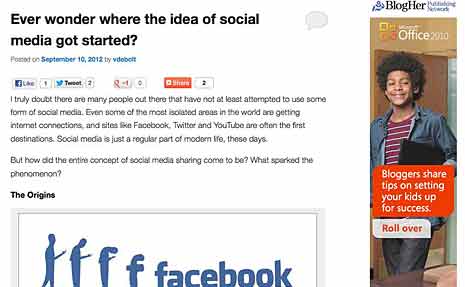
WT sidebar ad
There’s the required ad in my sidebar.

Here’s how I got that sidebar on every page. I started with the most basic theme you can get at wordpress.org: twentyeleven. There’s a newer one called twentytwelve, too. I chose this theme for several reasons.

  1. It comes from WordPress, made by WordPress, so I know I can trust it.
  2. It’s free.
  3. It has lots of bells and whistles, and it’s a responsive design. (See Should Your Blog Use Responsive Design?)
  4. It has a very simple and clean look, which I like.

The twentytwelve theme has lots of bells and whistles, too. It is a mobile first design. (See The Mobile First Craze.) I didn’t think I needed to go that far, so I stuck with twentyeleven.

The only drawback to this theme is that the single post pages (called Single in WordPress) and the individual pages (called Pages in WordPress) did not have sidebars. No sidebar, no ad space, which means I couldn’t comply with the BlogHer Ad Network requirements for running their ads.

I had to modify single.php and page.php to add the sidebar. And I had to modify functions.php. I’ll take you step by step through the process. You can do some of this in the WordPress admin area. I also used a text editor and an FTP tool.

Step 1: Install the Theme and Create a Child Theme

Use the blog admin area where you choose a theme to get twentyeleven ready to go. Or you can download twentyeleven from WordPress and add it to your site themes directory using FTP.

Here’s the thing. You have to have twentyeleven on your server, but you are not going to switch to that theme. You are going to use a child theme.

Making a child theme is actually easier than it sounds. You add another folder to your site’s theme’s folder. I did this using FTP, but you can use your site host’s control panels to add folders, too. Just make sure it’s in the themes folder and at the same level as the twentyeleven folder.

Nothing goes into the child folder, which I named twentyeleven-child, except a style.css file and a functions.php file. I started with blank files that I made by saving text documents with those two names.

Here’s the structure you need to see on your server, according to the WordPress Codex.

  • site_root (www)
    • wp-content
      • themes (directory where all themes are)
        • twentyeleven (directory of parent theme, Twenty Eleven)
        • twentyeleven-child (directory of child theme; can be named anything)
          • style.css (required file in a child theme; must be named style.css)
          • function.php (not required in a child theme, but needed to modify the pages to add the sidebars)

Once this child folder is in your themes folder, you will see the child theme as a option in the WordPress Appearance > Themes area where you choose a theme. Let’s do a couple of things to the CSS file before we choose it as the theme, though.

What Goes in the CSS File?

In the style.css file in the child theme, you start out with this:

/*
Theme Name:     Twenty Eleven Child
Description:    Child theme for the Twenty Eleven theme 
Author:         your name
Template:       twentyeleven
*/

@import url("../twentyeleven/style.css");

Upload this into the child theme folder.

When you use a child theme, the browser uses any modification you put into the style.css file, but it also looks up to the imported stylesheet for everything you don’t modify. So when you pick this child theme as your theme, the css file tells the browser what the parent theme is and where the parent style sheet is.

Okay. Now you can push the button in the WordPress theme admin area to choose the child theme. Take a minute and go look at your blog with this new theme.

You could do nothing more than this and your child theme would work. It would be exactly like the parent theme, so you probably want to create a few style rules of your own in the child theme that will overrule the rules in the parent theme.

Just as an example, I didn’t like the looks of the h3 tags in the parent theme. They were too small, there was too much white space around them, they weren’t in bold, and they were all caps. So I figured out which rule I wanted to change and added this to the child style sheet:

.entry-content h3,
.comment-content h3 {
	font-size: 16px;
	font-weight:bold;
	line-height: 1.6em;
	text-transform: none;
}

This takes precedence over the rule in the parent theme CSS file, so now I have h3 headings that I like better.

Step Two: Modify single.php and page.php

You need to add the sidebar to pages and single blog posts. You open single.php and page.php in a text editor and upload the changes by FTP. You are going to modify these pages in the parent theme folder, not add anything to the child theme folder.

Open single.php in the text editor. At the very end of the page add

<?php get_sidebar(); ?>

It should be immediately before this line:

<?php get_footer(); ?>

Do the same thing to page.php. Save them both and upload them to the server – back into the parent theme where they came from.

Step Three: Modify functions.php

Now we come to the functions.php file. I found these directions at Twenty Eleven – Sidebar on Single Posts and Pages and they worked perfectly.

Add the following code to the up-till-now blank functions.php file in the child theme folder. Don’t do anything to the functions.php file in the parent theme.

I have no idea what this php is doing, but I can copy and paste like a champ. The author of the code says it will, “Suppress the .singular body_class from the single post or page,” so the sidebar can be added.

add_filter('body_class', 'blacklist_body_class', 20, 2);
function blacklist_body_class($wp_classes, $extra_classes) {
if( is_single() || is_page() ) :
// List of the classes to remove from the WP generated classes
$blacklist = array('singular');
// Filter the body classes
  foreach( $blacklist as $val ) {
    if (!in_array($val, $wp_classes)) : continue;
    else:
      foreach($wp_classes as $key => $value) {
      if ($value == $val) unset($wp_classes[$key]);
      }
    endif;
  }
endif;   // Add the extra classes back untouched
return array_merge($wp_classes, (array) $extra_classes);
}

Now that you have something in your functions.php file, upload it into the child theme folder again.

Anything you put into your sidebar via widgets should now appear on every page of your blog.

An Alternative

After I had done all this, I discovered Extend WordPress Twenty Eleven Theme to Include Sidebars and More Flexible Options that uses an extension to do all this and more. Sound easier? You might give it a try first. One drawback – it won’t work using a child theme. WordPress recommends that modifications to a theme be done with a child theme.  But, if easier is better in your world, you might choose to ignore the recommendation to use a child theme and go with the extension. It gives you choices in the WordPress Admin area that let you select options to add sidebars.

[Editor’s Note: Cross posted on BlogHer in slightly different form.]

UPDATE: 1/25/2013.

Since writing this post I discovered a much simpler way of insuring that the sidebar appears on each single page you might want. The theme itself provides a sidebar template, which you can find in the page attributes section of the dashboard while you are editing the page.

Page Attributes

Select the sidebar template for the page and you are good to go.

The Mobile First Craze and Bloggers

Is your blog ready for mobile? Do you know how it looks on an iPhone or Kindle Fire? There’s a push to create websites designed for mobile first and the browser second. 

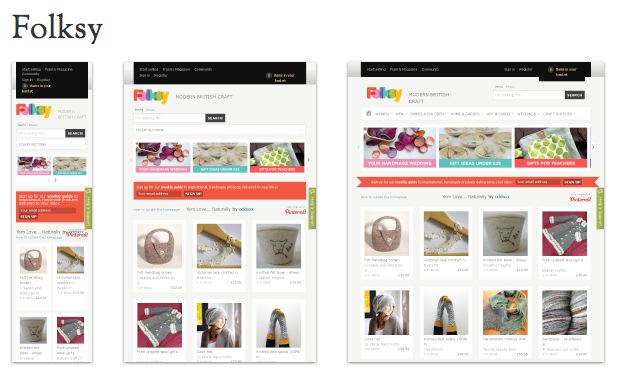
folksy
Folksy screenshot via mediaqueri.es

The reverse of the mobile first idea is to start with a desktop design, but make it “responsive” so that it can adapt to any size device. You see that idea at work in the image of the British crafters site Folksy above. I wrote about responsive design last December in Should Your Blog Use Responsive Web Design?

Recently this tweet from Laura Scott got me thinking about how sites look on mobile devices again.


This is a pet peeve of mine too. I don’t always spend time on Twitter when I’m at my computer. Frequently I look at Twitter when I’m away from the house in a waiting room or sitting outside the school waiting for the grandkid. I’ll see something that really looks interesting, but when I follow the link it’s unreadable on my iPhone.

This problem could be solved if sites were designed with mobiles in mind from the very first, or if they were designed respond to mobile devices with different layouts.

Luke Wroblewski wrote a book called Mobile First and is the leader among the proponents of this idea. He explains, in an article at Net Magazine, why he supports the approach.

But things have changed so dramatically over the past few years that starting with the desktop may be an increasingly backwards way of thinking. Designing for mobile first can open up new opportunities for growth and lead to a better overall user experience. Let’s dig into the three key reasons why: mobile is seeing explosive growth; mobile forces you to focus; and mobile extends your capabilities.

Luke’s comment that mobile forces you to focus means that you really have to think about what’s important. You can’t have content that isn’t part of your main message cluttering up the screen when you only have 480×320 pixels of screen space. Narrowing your focus can also extend capability by reducing download speed and making your site easier to use and navigate.

What about Blogs?

Most bloggers are not creating their own templates or themes. But fortunately, the folks who do create templates and themes for blogs are well aware of the need for blogs to work on mobiles and well as desktops. The default WordPress themes 2011 and 2012 are both responsive designs. Switching to one of them guarantees you a good result on a mobile device.

Blogger also allows you to switch to a mobile theme.

If you are unafraid of the idea of designing your own WordPress theme from scratch, here’s a helpful article by Ellen Bauer at Smashing Magazine that explains how to Create A Responsive, Mobile-First WordPress Theme.

Check Yourself. And Everyone Else

What if you don’t own every possible size of mobile device to take a look at your blog and check yourself?

There’s a handy bookmarklet available from Benjamin Keen. You download the bookmarklet and put it in your bookmarks toolbar. Then you can see how your site, or anyone else’s site looks in various sized devices.

You may be losing readers if you don’t find out.

[Note: Cross-posted on BlogHer in slightly different form.]

Make the Election Digital

It’s a high tech political season. According to Journalism.org both campaigns are using digital tools to make direct contact with voters. Your inbox, your social media sites, and the apps on your smart phone may play a part in how you deal with the election.

The fight 2012
The Fight 2012: Cain and Todd Benson via photo pin cc

There are many apps and online tools that you can use to help get through election season and make a choice about your vote.

Truth Finding Apps

Several apps help you find the truth behind the statements and ads. The Super Pac App for iPhone and iPad can listen to an ad and then tell you who paid for it. The Super Pac App was created by MIT Media Lab students. Ad Hawk from the Sunlight Foundation does a similar thing – listens to an ad and then tells you who is behind it and who is spending the money on the ad. Ad Hawk works on iOS and Android.

Another fact checker is PolitiFact’s Settle It!. Settle It! tells you what the real facts are behind political statements, pulling its information from the PolitiFact site.

The Washington Post has an iPad-only app. According to Poynter.org the app organizes a new section called The Forum,

with easily browsable Twitter lists that organize more than 300 relevant accounts into six groups: news outlets, campaigns, partisans, prominent office holders, fact checkers, and jesters (like @ColbertReport and @LOLGOP).

Candidates’ Apps

Mitt Romney had an app just to announce his VP choice. That’s old news now, but an interesting concept in a single purpose app. Perhaps there will be more from the Republicans like this.

Barack Obama’s app is Obama for America and is aimed at neighborhood get-out-the-vote organization and help. This technique worked for the Democrats in 2008 and they are sticking with it.

On the Obama web site, you can compare Obama and Romney tax cut plans to see how they would affect you. There is a description below the fold on this page about how the calculator works and where the information came from (The Tax Policy Center).

Convention and News Watching

Time Warner has a CNN-Time Convention Floor Pass that brings you convention news. It’s for both iOS and Android devices.

NBC Politics is designed to bring a steady stream of political news to your smart phone. NBC Politics is from MSNBC. Fox News also has a political news app, You Decide 2012 Map. You Decide 2012 is only for iPad. If MSNBC and Fox News don’t do it for you, you can always get the politcal news app from Politico.

If you’re into poll watching, Talking Points Media has a Poll Tracker app that tracks polls in real time.

Voter Registration and Voter ID

Rock the Vote has an online voter registration form.

The Cost of Freedom Project is tracking which states are requiring photo voter ID. You can check state by state voter ID requirements at this site.

Choosing Between the Candidates Sites

There are several sites that promise to help you identify which party you should give your vote to. The Political Party runs you through a series of questions and identifies the candidate who should get your support based on how you answer the questions. The Political Party claims to be nonpartisan and has a set of FAQs that tell how they determine how your answers align you, party-wise.

Politify shows you the impact of the two candidates avowed plans for the country on a personal, local and national level. The site uses IRS and Census data to find where household income comes from and what government services households use. The app then produces a simulation of how President Obama and Mitt Romney’s economic plans would affect specific areas of the country. You can go for a wide view, or take it down to your own zip code.

Election Watching in Other Ways

Even Amazon.com can resist getting into the act. According to Puget Sound Business Journal, Amazon published a “heat map” of political book sales that shows where U.S. residents are buying conservative or liberal books. I’m not sure this proves anything, but it’s interesting to examine.

Venture Beat tells us that Facebook and CNN have teamed up to create a Facebook I’m Voting app that will add more politics to your news feed. Could it be that a Facebook wall full of the politcal opinions of your friends isn’t enough for some Facebook users? Hard to imagine.

You can listen to radio shows and podcasts about the election with Stitcher. Stitcher has a special new category called Election Center that lets you choose particular candidates, commentators and sources to follow.

Whether you use these digital tools to explore both sides of the issue or support your already firmly held opinions, there’s something perfect for you in the race to November.

[Note: Cross posted at BlogHer in a slightly different form.]

Apple Product Rumors

On September 12, Apple is staging another event to announce the release of the next version of the iPhone – and possibly an iPad mini. The rumors are flying about the big reveal, but the thing I’m most stoked about is the possibility of an iPad mini. According to Apple Insider such a device would come with a 7 inch screen and be considerably thinner than the 9 inch iPad. Plus, it would be less expensive!

A new iOS release always brings with it a ton of cool new features. The way Apple’s system works is to make the new iOS available on all iOS devices such as iPhones, iPads, and iPod Touches. So even if there are no new devices like the rumored iPad mini or the rumored new iPod Nano, there will be exciting changes to current iOS devices as they upgrade.

To get ready for the newest Apple gadgets, you can find advice about when to buy a new iPhone at TechCrunch. Geek Sugar provides advice on how to prep an old iPhone for sale.

iPad Mini, Please

There are so many tablet devices competing with the iPad – Kindle Fire, Nook, Surface, Nexus, and more. Like anything that isn’t Apple, all the competing devices are less expensive. I’m crossing my fingers in hopes that predictions like Mashable’s statement that, “a device around $300 would hit the sweet spot for customers,” are true. Even better, Apple Insider is talking about a price between $200 and $250.

There are mockups and concept designs (such as the one in the image above) and much discussion about how an iPad mini would look. Is it going to look like an iPad, only smaller, or like an iPod Touch, only bigger? Daring Fireball parses each detail of the potential design. I want smaller, lighter, and cheaper.

Have you tried holding a iPad up in front of your eyes at a distance comfortable for reading a book? Those suckers get heavy quickly – much like the way a 10 pound baby parked on your hip can start to feel like a ton after a few minutes. Even my iPhone, which I use to read books, starts to get tiring to hold up. I like the bigger format, but not the weight. An iPad mini would be just the right compromise. And a much more affordable price.

Other Rumors

Other rumors talk about a taller screen on the iPhone, and about the possible resolution of the new devices. The rumors about a new iPod Nano are simply that there may be one.

Which rumors are you hoping turn out to be reality? Is an iPad mini on your wish list, too?

Cross-posted at BlogHer.

Making a App: One Game Maker’s Success Story

Naomi Kobuko was an experienced business woman. She and her husband were running a game development company called LavaMind. He did the games, she took care of the business side. That is, until she decided she wanted to make a game, too. She knew nothing about how to do it. This is the story of how she learned.

naomi kobuko
Image courtesy Naomi Kobuko

Naomi explains how she got started learning what she needed to know:

“I didn’t even know how APIs really worked,” said Naomi. “I used to blank out when anyone talked tech to me. I’d worked in the game business, but I was never one to code.”

“The thing that helped me the most was the community. I stumbled upon the computer language Lua and joined the Corona Labs community. As soon as I plugged into the forums, I felt connected, and I began to suck up knowledge. Whenever I got stuck, someone always posted something that helped me get over the hurdles.”

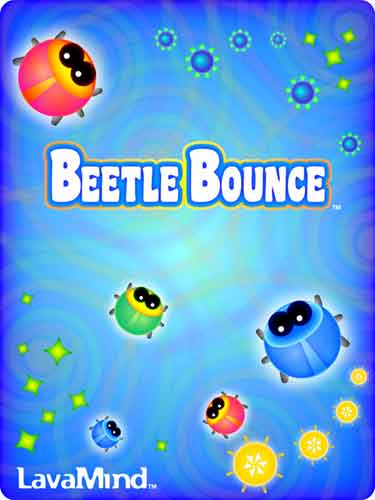
About a year later, Naomi completed her first game and is now the one helping newbie coders. Her game is called Beetle Bounce.


Image courtesy of LavaMind.

More than just a finished game that works on iOS and Android, it was a Top Game Pick on Nook and she was getting offers of marketing money backing.

I was fascinated by Naomi’s story of how she learned with the help of a supportive community and wanted to know more about her background. She answered a few questions for me.

Q: Can you explain your background?

A: I’ve actually had a varied career. I grew up in a small farming village in Japan. My father was a Christian pastor, which is quite unusual in Northern Japan.

I went to college in Tokyo at ICU (International Christian University). When I graduated, I worked as a financial analyst for
Morgan Stanley. Then I moved to the United States to be with my husband, and I worked in real estate.

Real estate wasn’t my thing, so I began translating for TV and film productions, and I wound up coordinating international film productions. That was a blast. I also worked translating manga (Japanese comic books) into English. I’ve translated some volumes from popular series, including “Naruto” and the “The Ring”.

Around the same time, I partnered with my husband to form LavaMind. My husband did all the coding on our first games, while I did the graphics, sound and helped manage the business. Our first game was Gazillionaire, and it was successful. So we did two more business simulation games: one called Zapitalism, and another called Profitania. These are very popular for teaching kids and adults entrepreneurship and money management. After this I worked for several startups doing business and finance.

After this, I wanted to work from home again, but I couldn’t justify hiring an engineer. It’s so expensive in San Francisco and games are risky business, so I began to teach myself to code. After a year of hard work, I’d completed Beetle Bounce.

Q: What age group is Beetle Bounce for and what’s it about?

A: I designed a game that I wanted to play myself, so I’d say it’s primarily for women (and men) who like casual games, like Peggle, Zuma, and Tetris. That said, it seems to appeal to everyone. It’s easy to play and action-packed, so even kids get into it. Girls love it!

Q: It sounds like you did this single-handedly with just help from the online forums at Corona Labs. That’s amazing to me. Are you planning to do your second game the same way?

A: Yes, I did it all myself. I like the freedom of working for myself and not being reliant on anyone else. It’s completely liberating. I had so many jobs where I had to be in an office and rush around to meetings, which is difficult when you have two boys. I really enjoy working for myself at my own pace. I also love the freedom to create whatever I feel like making. I plan to continue creating new, original games as long as my brain is still sharp!

Q: Do you blog somewhere?

A: Yes, I actually run a blog called Founders Space. It’s quite popular with startups and small businesses. That’s my main blog. LavaMind is on Twitter, too, @lavamind.

More Resources for Making a Game Yourself

Other moms who have a great idea for a game but need help with learning how to make it a reality may want to check out the community forums at Corona Labs that helped Naomi so much.

The community at Moms with Apps is also very helpful. Recently Moms with Apps published Resources for Beginning Programmers. They asked,

If you want to build an app from the ground up, and you aren’t a computer programmer, where do you start?

The resources suggested by that community are listed in the article, with Corona among other helpful sites named by mom app developers.

For someone with an idea and an interest, making a popular game that can be sold in the mobile marketplace is definitely possible. Naomi Kobuko did it, and you can, too.

[Note: Cross-posted at BlogHer.]

Basic Knowledge for Bloggers

You don’t need to know anything technical to have a blog beyond how to get around on a website and follow instructions. It’s no more complicated than setting up an account on Amazon and ordering a book. But you could be a better and more effective blogger if you did take the time to learn some of the basics of how your website works.

blogger
Blogger by Virginia DeBolt via Flickr

Why would you be better and more effective, you ask? Here are a few reasons.

  • You would have more control over your website
  • You would be able to customize your website
  • Your website would work better in all devices
  • You would be better able to handle the inevitable technical issues that would arise
  • When you wanted to try something new, you would understand how to do it
  • You could avoid newbie mistakes

It’s worth a moment to explain the newbie mistakes item, and how it relates to the item about your website working better in all devices. The cleaner and simpler your HTML is, the better it’s going to work in all devices – from big old computer monitors to tiny smart phones. The biggest newbie mistake is forgetting that not everyone is looking at your website on your monitor, at your resolution, under your circumstances. Using those lovely tools above your text entry box on your blog dashboard to center text or images, to change the colors of text, to use several different fonts and text sizes, to add extra lines of space – all those things add complexity to your HTML. Adding complexity to something that works best when its simple and basic means that things may not work so well for someone who is not looking at your website on your monitor, at your resolution, under your circumstances.

If you want to start learning more about what goes on behind the scenes on your blog, here are the steps to take.

  1. Learn some HTML (Hypertext Markup Language). HTML is very simple, but it’s the foundation of everything else on the web. Using it right makes everything on your web page work better in every browser and in every device.
  2. Learn something about CSS (Cascading Style Sheets). Styles are what make your correctly marked up text look beautiful on a page.
  3. Learn a little about programming languages such as JavaScript and PHP. You don’t have to be able to write a program, but you should have a glimmer as to what’s going on when you try to customize things.

What I want to share with you in this post are pointers to places where you can get started with the basics of HTML, CSS, and programming. Just knowing the basics will be enough to make your blog more your own and more what you really want it to be.

Where to Learn the Basics of HTML

HTML is used to format text. Text is marked as a paragraph or a heading or a link or a list. When the text stops being a paragraph or a heading or whatever, the formatting is turned off. This works with tags that open and close the formatting – or you might think of it as turning on and off a section of formatting. Here are a few places to learn some HTML:

Where to Learn the Basics of CSS

CSS is used to control the appearance of everything you formatted in your HTML. It can set backgrounds, colors, fonts, positioning, whitespace, line height, widths and heights, how lists look, and much more. CSS doesn’t use tags, but it selects tags using a system of selectors. Once something is selected, a rule for how it will appear is written – and bingo bango, the way the selected item appears on your page is changed. CSS is more complicated than HTML, but you can start slowly with it until you get the hang of what you’re doing. Here are a few places to learn some CSS:

Where to Learn the Basics of Programming

Programming languages abound, but the most common ones bloggers run up against are JavaScript and PHP. The programming behind your website does the heavy lifting of making in interactive, making it possible to receive comments, and sending in mail from your contact form. Programming is the most complicated thing you need to learn about in understanding how the web works. Get a grip on the HTML and CSS first, before you start learning about programming. Here are a few places to learn something about programming:

What are you waiting for? Go get started on being a better blog owner.

[Note: Cross-posted at BlogHer.]