The CSS interface for Dreamweaver CC is very different from the classic look seasoned users interacted with for years. In Dreamweaver 6, CSS 3 transitions were added to Dreamweaver’s design tools. The interface works approximately the same in Creative Cloud (Dreamweaver CC).
I added a transition to a couple of images on my home page. Here’s how I did it, step-by-step.
1. Find or create a selector
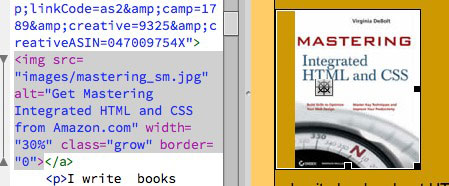
I decided to apply the transition to a couple of book images. I added class="grow" to the images, so I could target them easily for the transition.
Also note, while you’re looking at the code for the image, that it is set at a width of 30%. My goal is to change that width with my transition rule.
2. Add a new Transition and Target a Rule
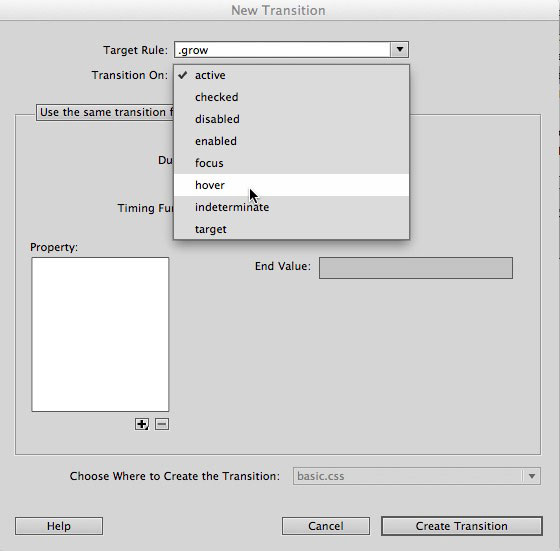
In the CSS Transitions panel, I clicked the familiar plus sign to add a new transition. A dialog window opened. I’ll go through it in steps.
First, pick the target rule. Every rule you have in your style sheet is shown in alphabetical order. Like any other field in Dreamweaver, you can type directly in the field if you want instead of looking through your list of styles. I selected the .grow rule to target.
3. Transition On
The next choice is to decide when you want the transition to happen. You can see the options in the image. I picked on hover.
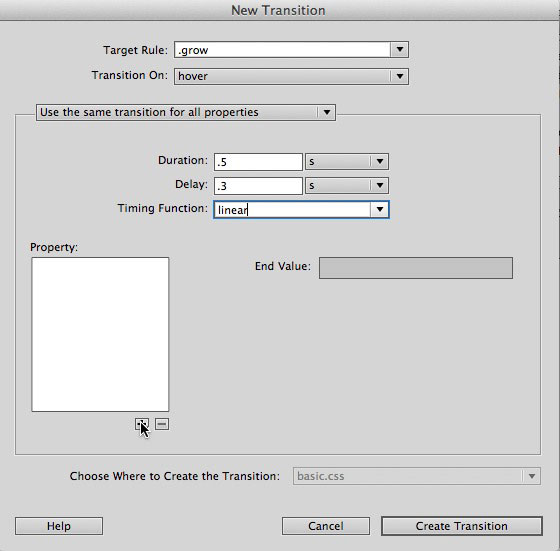
4. Pick the timing
You can use the same transition for all properties, as I have here. You can also set different transitions for different properties if you want to have more than one transition happening in the same event.
You set the duration and delay in either seconds or milliseconds. The timing function offers ease-in, ease-out and others as well as the one I picked, linear.
5. Pick a property to transition
Click the plus in the Property area. As I mentioned, my goal is to change the width of the image during the transition, so I picked the property width. I set the end value to 40%.
Finally, I picked the stylesheet where I wanted it saved, and clicked Save Transition.
And You’re Done
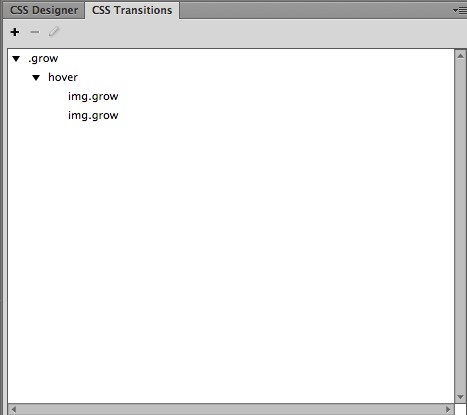
That’s the transition. It’s now shown in my CSS Transitions pane. I can edit it at any time by double clicking the transition.
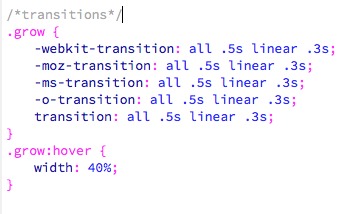
This was added to my stylesheet. The necessary vendor prefixes are included.
In a browser, you see the normal display to the left, and what happens on hover to the right in this composite image.
You’re now ready to make transitions happen in Dreamweaver Creative Cloud.
See Also: Dreamweaver and CSS in Creative Cloud
